Sunday, September 25, 2016


I have been wanting to try my hand at sublimated Key Fobs/wrist bands for some time now and finally have gotten the materials to try this out.

What you will need:

*Sublimation printer
*Heat Press
I found mine on Amazon. I have found since I purchased, the vendor has raised the price slightly. So you may find it less expensive with a different vendor online. What you are looking for is 100% Poly heat printable webbing.

*You will also need lanyard key fob hardware.
I also found the hardware on Amazon from this same vendor. 

*Lastly, you will need a special pair of pliers to secure the hardware onto the lanyard.

You can use regular pliers you just to ensure you have some painters tape around the teeth of the pliers not to scratch the fob hardware

if you do not want to invest this much qty to your project, all of these items are found at your local Hobby Lobby or Michael's store. HOWEVER, it may be cost effective to just purchase in bulk.
With the lanyard and hardware I purchased, I can make at least 50 fobs


DIRECTIONS ON HOW TO MAKE KEY FOBS

You will want to print your design from your design program you have with your sublimation printer. I personally use Corel Draw as my design program. 
I made sure my design was a little over 1" wide and choose to make it 10" long (FOLDED OVER WOULD BE AROUND 2.5" ON EITHER SIDE)
Making the design a little over 1" wide ensure that your design will completely cover side to side of the lanyard. 
Your heat press should be set a 400 degrees for 40 seconds 
Pre-press the lanyard for 3 sec at 305 degrees
On a side table lay the design (design face up) and place the lanyard over the design, use heat press tape to make sure the lanyard stays in place
Place your sheet of heat protector paper over your heat press pad and place the lanyard with design on that, cover with another piece of heat protection paper
Heat press for 40 seconds 
When complete, remove the lanyard and remove the design paper. 
Repeat the steps for the other side of the lanyard.

There is a great video by Conde Video creating Key Fobs.
You can also search YouTube for other amazon key fob tutorials.

Here are my creations I plan on giving to my family.
The fobs that I will be selling will be posted on my website store soon! They will range from $7 on up depending the design detail and customization. 

These key fobs can be created with just the sublimated design like pictured or a decorated ribbon can be sewn or heat bonded in the middle over the sublimation. That decorated ribbon is made of grosgrain poly which can also be sublimated upon. 
The design options are really endless. 

If you do not have a sublimation printer... no problem. you can sew all the items and make your key fob. There are also videos on YouTube for non sewing and sewing key fob tutorials
I also plan on looking into bracelet hardware to make bracelets out of the lanyard as well. 

Saturday, September 17, 2016


So, I found this adorable DIY candy jar on Pinterest! My second home, as my husband would call it. 


I thought this was so cute and thought I would make this myself. 
You will need the following materials

1 - Small pottery plant container
1 - Small pottery plant base
1 - Glass small fish bowl or small round vase (proportionate to our planter size)
Ribbon of your choice
1 - cabinet knob
Glue gun and stick
Black spray paint or acrylic paint and brush
Candy Corn candy or any candy of your choice

1.) Lay the pottery items on newspaper and get ready to start painting or if you are using spray paint take it in a well ventilated area and start painting the pottery and cabinet knob. 


provided by iheartnaptime.blogsopt.com

Let the paint dry completely. 

Now it's time to hot glue the bowl.
Turn the planter upside down
Set the glass bowl on top (open side up) and center. 
Remove the bowl and place a large amount of hot glue on the bottom of the painter as well as the bottom of the bowl and put the bowl back on the painter. 

Let dry!

While that is drying, take the planter dish and turn it upside down
hot glue the painted cabinet knob to the bottom of the planter dish making sure it is
centered and in the middle. 

Let dry!

Now its time for the candy..... I love me some candy corn and with autumn quickly approaching this cut candy dish will be a great feature in my dinning room or entry way. 

Add your choice of ribbon around the center right below the glass bowl. 
I did not secure the ribbon as I wish to change out the ribbon during the season. 


Here is my final piece. I did purchase the planter base for a larger planter so the lid is a little too big and next time I make, this will use a larger glass bowl.
The glass bowl I used was a small flower bowl from Dollar Tree. 
Planter, base, ribbon, knob and candy all from Walmart.

Below are some more pics of various other candy dishes using this same concept.


Day 7 with my new 365 Happy Planner and I am loving it. 

Ok... so have this planner for a few days now, and I already want to put more in it. I run a side business along with working a full time corporate job and have a busy home life with kids and errands and appointments, I can already tell I need to add more to my planner to have everything in one location. 

SOOOO... for those that want to purchase everything new! 365 Happy Planner has a wonderful hole punch just made for your Happy Planner. You can find the hole punch at any neighborhood craft store. Michael's still has a sale on their planner items and the hole punch is now 40% OFF.  The punch for the mid size planner is regularly $29.99


But, if you are the creative and thrifty type of gal like I am, you can easily adjust the pages you want to put in your planner and create the holes yourself. 

You just need the following items
 Scissors
Single regular hand held hole punch


You can also find fabulous FREE insert pages for your planner. There are lots of them online, be careful some say FREE but then they direct you to an Etsy store or some other store and are not absolutely free. I do not see why I would pay for one unless I just can't make it using word or excel. 

The one product that I may purchase this weekend is additional dividers. BUT am going to try to make these with card stock I have on hand. Will post my experience with this DIY idea in a later post. 

**************************************************************************


The first thing I did with my planner was remove the month that have already passed. Those were June, July and Aug. This wasn't so bad as the planner has June 2016 - Dec 2017 in it. 


Then I began personalizing it, adding my name in areas and important dates.

Basically that is all I have done. Once I add my personalized inserts I will have much more to add. 


I plan on posting in the future my personalized inserts and how I made them :)


Wednesday, September 14, 2016


For those reading my blog for the first time, you should read my previous posts. I recently purchase a 365 Planner at the Pinners Conference here in Dallas TX. I wanted to share with you about this new little planner I purchased. 

The pages are brightly colored and definitely enough rough to write big and offers a calendar and weekly view pages. I will go into more detail about the actual planner in future posts. 

This post is about the extra's I purchased from Michael's after the conference. At the time they had their 365 planner accessories and planner on sale. 

One of the items I was for sure to purchase was the carrying case for my new 365 Happy Planner. 

This carrying case was around $18 I saved over $12 as I have seen them online for $30


The case itself is black and white stripped with light turquoise accent trim. If offers (2) full length zippers and (2) handle straps. 


When opened it has a side pocket and a see through zipper pocket. Behind that zipper pocket is also another zipper pocket the full length of the case. 


The other size features (2) zipper pouches for pencils, stickers etc; and they are both have velcro on them so they can be removed. 

I absolutely love this case. It holds all my accessories, pens, stickers, tabs, and even my planner in place. 

I now carry my planner and accessories every where I go. 


It's all about the stickers.
I also purchased some Happy Planner stickers. They had several to choose from and are still on sale, by the way. 


I choose some basic stickers mainly because I found this small selection had "followup" stickers, "important" stickers and things like that. There was 5 sticker sheets in each pack and these stickers are not thin, but thicker than normal stickers so are made to last. 
More geared toward actual planning and scheduling of things instead of geared toward recipes or exercising.

I can't wait to use my stickers and start planning out my days. 
I will mostly be using the new 365 Planner for scheduling my fair and craft events and my kids school functions.

There is much to learn about this new Planner obsession I have so in order to be in the know and learn all I can about the in's and out's of planning, I am going to attend Michael's free Planning Class. 


Sunday, September 11, 2016

ME AND MY 365 PLANNER FROM 

ME AND MY BIG IDEAS!

Yes, I turned a year older this week, and had a great time this week. My family and I attended the Pinners Conference in Dallas TX. 

It was very packed, lots of vendors.. I mean lots. 

It was so much fun to attend and I got a lot of great ideas. You see our little shop, Lovin The Bling Designs, will be attending, as a vendor for the first time, some craft fairs coming up in November and I am so glad I got some great ideas on how a great booth should look. A lot of the vendor booths at the conference were decorated and presented so well. Just means I need to get on the ball and get my booth layout ready prior to my first event in November. 

While at the conference, I found a booth called "Me and My Big Ideas". Sad to say and admit that I had no idea what this business was all about. Looking into it further, it was all about planners, decorating and embellishing planners. 

I had a calendar planner that I carried with me and really didn't think I needed a different one. This worked for me. Yes, it was old. I knew this because when I tried to find inserts for my old planner/calendar I couldn't find them at my neighborhood Walmart, but had to go to Officemax and even online with Ebay and found some inserts.

Looking through all the 365 planners Me and My Big Ideas booth provided, I broke down and purchased my very first 365 Planner. Ta Da! Now what?
Click on the picture to take a look inside.

I love the colorful pages and how big they are.. I write a little big so glad there is enough room to write. This is the smaller size planner, not the 8.5 x 11 size. I carry my planner mostly everywhere I go.

I wanted a planner that was easy to carry and I like how I can add pages to this planner, even print them off online. Some sites I have found offer free printable planner pages.

After getting my planner and doing some searches online... this planner rag is a large group phenomenon. There are planning meetings, gathering, functions. Loads of extras you can purchase from washi tape (what the heck is washi tape) to stickers, pen holders, carrying cases, you can even opt to change the cover of your planner.... just like a phone case! Go figure... Who'da thunk. 

Course, I got caught up in all the cool extras. I will post on my blog in the days to come after digging into this new Planner and will review some of the extras I went out to Michael's to purchase.  
Luckily, Michael's had a great sale and still does on their 365 Planner items.


Friday, September 2, 2016

YAHHHH whistle blowin' and let my FRIDAY long weekend begin !!!! whoot whoot...

 so glad for this upcoming 3 day weekend you have NO IDEA.

So many orders to fulfill and I plan on organizing my office, big time. De-clutter is the word.

First full week of school is in the books and big boy had a good week. Frankly, I am so surprised that I did not get a call from the school in the first week. I hope this is a prelude to how the year will go.

Fingers crossed! :)

Won't be long sill those days of flip flops are gone and in comes the days of fashion boots and leggings.

Gotta make it to the salon this weekend for some much needed feet treatment. Deff need some TLC on these peepers.


Thursday, September 1, 2016


Visit our facebook page that has lots of products to browse through. 

Be sure and LIKE us on facebook! 


So, I have made big change in my life. I had been a Scentsy Consultant for almost 6 years and decided that I really needed to take something off my plate. Being a full time boss babe in the corporate world, mother, wife and trying to get our family business off the ground, Lovin The Bling Designs, was just taking up a lot of my time. I just couldn't do it all. Not Supergirl! :)

Moving on to a better and brighter future with our little home business. I thoroughly enjoy designing apparel, mugs, decals and more. I so enjoy seeing the smiles on my customer faces's when I deliver their products and love some of the ideas my customers come up with for their own products.
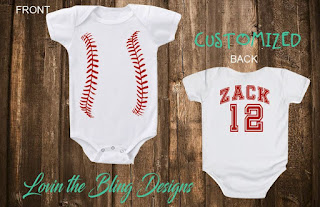
 Onesie or Romper Customized


This is one of the many reasons why I love what I do and decided to do devote more of my time at crafting it. Every day I am learning new ways of doing things.

This is now an easy business. I am epic failed every single day but I also learn from my mistakes. You never know how you will be at something until you try, right!

I will post more stories in the days to come on how this new adventure I have started goes.

Watch out WORLD!!! Here comes Lovin The Bling Designs to your neighborhood and hopefully, in the future, to a storefront.

www.lovinthebling.com
Let us customize your next fundraising products. Send us an email with your ideas. lovinthebling@hotmail.com